


This time when starting a new paper illustration of Sequoia National Park, I needed to do a more thorough planning process. After measuring the frame and box, I built my composition in Photoshop to scale, creating the different layers I intended to make.

Once I was happy with the colors and composition, I lowered the fill on each layer to 0% and gave it a 3 pixel stroke, creating an outline. I printed the outlines to scale and used it as the templates for the cut-outs.
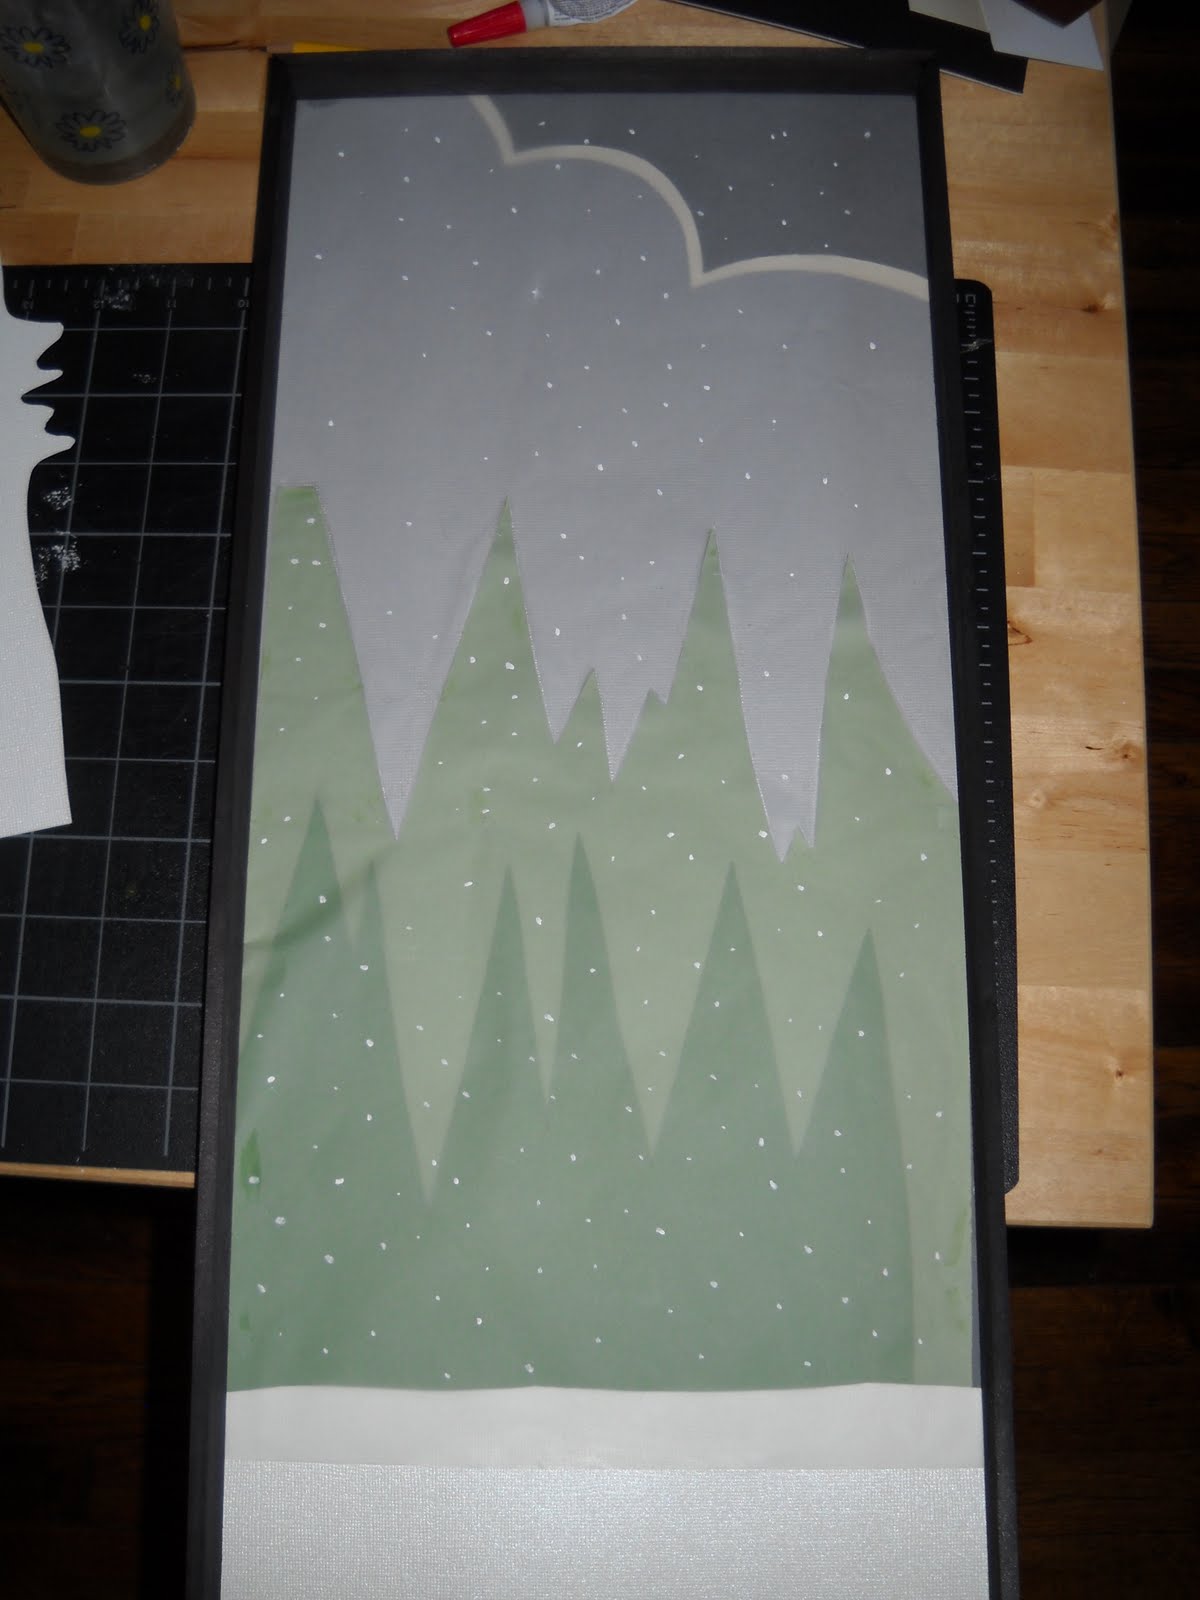
After cutting out the elements for the back layer, I placed tracing paper over it to create the dense atmosphere you often see in flurries and snow storms. Unfortunately, the only tracing paper I could find that had the right thickness was too short for my composition. So I cut the paper to correspond with the trees. A little bit of paint for the snow rounded out this layer.

The next layer is the middle ground. A little more detail goes into this one, particularly the bark on the monarch Sequoia to the right. To keep this layer at the correct height, I cut small squares of balsa wood for supports and fit them within the frame.

Another layer of tracing paper went over the middle layer (this time, using olive oil to make the bottom portion more transparent, giving a slight illusion of a gradient). I wasn't able to resolve the issue of merging the two tracing papers together, so I had to create tension on the paper to keep them lined up well. Next went the final layer, another monarch sequoia and the matte board. More snowflakes (painted and paper) were added last.
1 comment:
it's a great artwork , even if no one leaves a message before , keep doing stuff like this :)
Post a Comment